Connecting to Stripe for Payments
In this section, we'll guide you through connecting your project to Stripe for handling payments and managing user subscriptions.
Steps
1. Create a Stripe Account
Start by creating a Stripe account.
2. Access API Keys
Once logged in, go to Developer > API Keys in the Stripe dashboard.
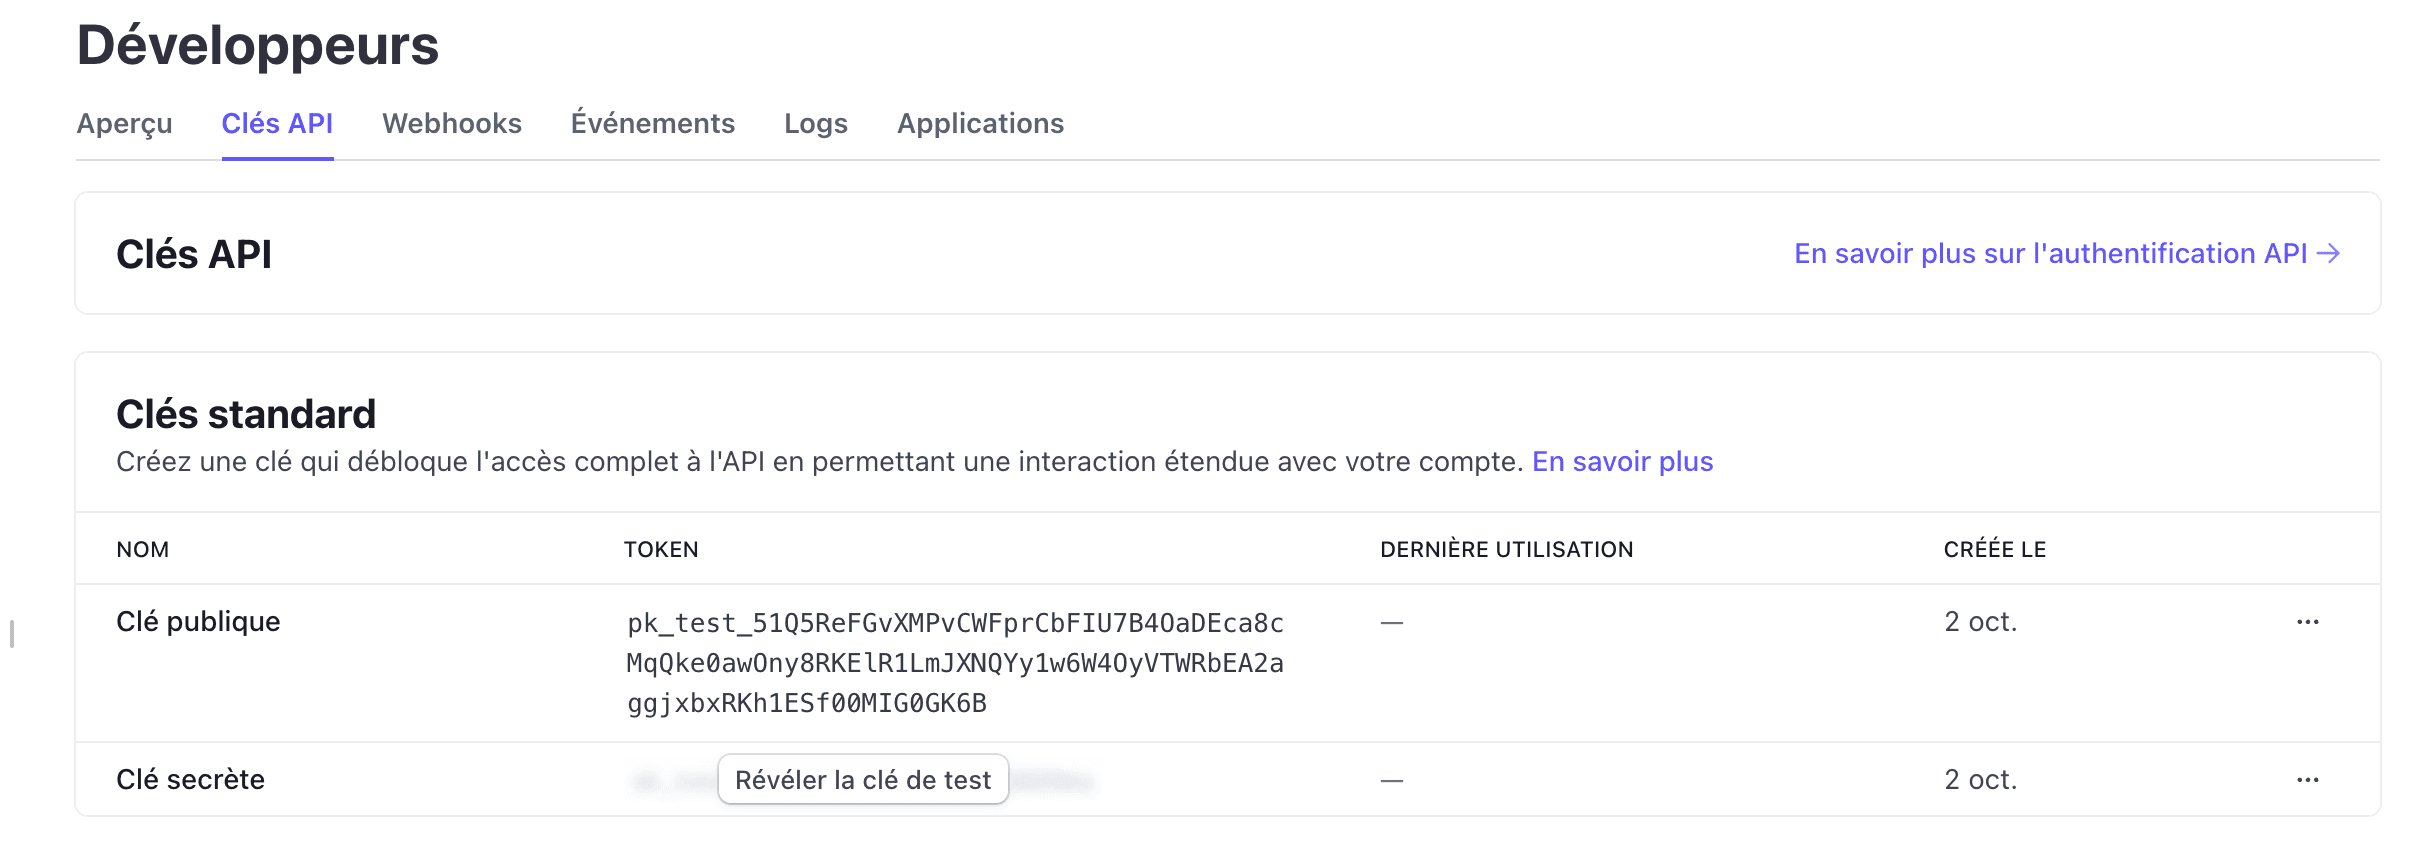
Copy both the Public and Secret API Keys and URL and add them to your .env.local file like this:
NEXT_PUBLIC_STRIPE_PUBLISHABLE_KEY=your_public_key_here
STRIPE_SECRET_KEY=your_secret_key_here
URL=http://localhost:3000
3. Set Up Stripe Webhook
To handle subscription updates and activate user accounts after payment, you need to set up a Stripe webhook. Follow these steps:
Go to the Stripe webhook page of your project.
Use the stripe login command to connect to you account.
stripe login
To listen to local events, use the following command:
stripe listen --forward-to localhost:3000/api/stripe-webhook
Add the generated webhook secret to your .env.local file:
STRIPE_WEBHOOK_SECRET=whsec_**********
This will forward Stripe webhook events to the route /api/stripe-webhook in your application.
4. Create Your Subscription Product
Now, create a product in Stripe that corresponds to the subscription plan you will offer.
In the Stripe dashboard, go to Products.
Create a new product for your subscription.
Once the product is created, click on it and copy the priceID.

Add the priceID to your .env.local file:
STRIPE_SUBSCRIPTION_PRICE_ID=price_**********
Your .env.local file should now you look like this (you can also compare to the one in .env.example)
NEXT_PUBLIC_STRIPE_PUBLISHABLE_KEY=pk_test_**************
STRIPE_SECRET_KEY=sk_test_**********
STRIPE_WEBHOOK_SECRET=whsec_**********
STRIPE_SUBSCRIPTION_PRICE_ID=price_**********
URL=http://localhost:3000
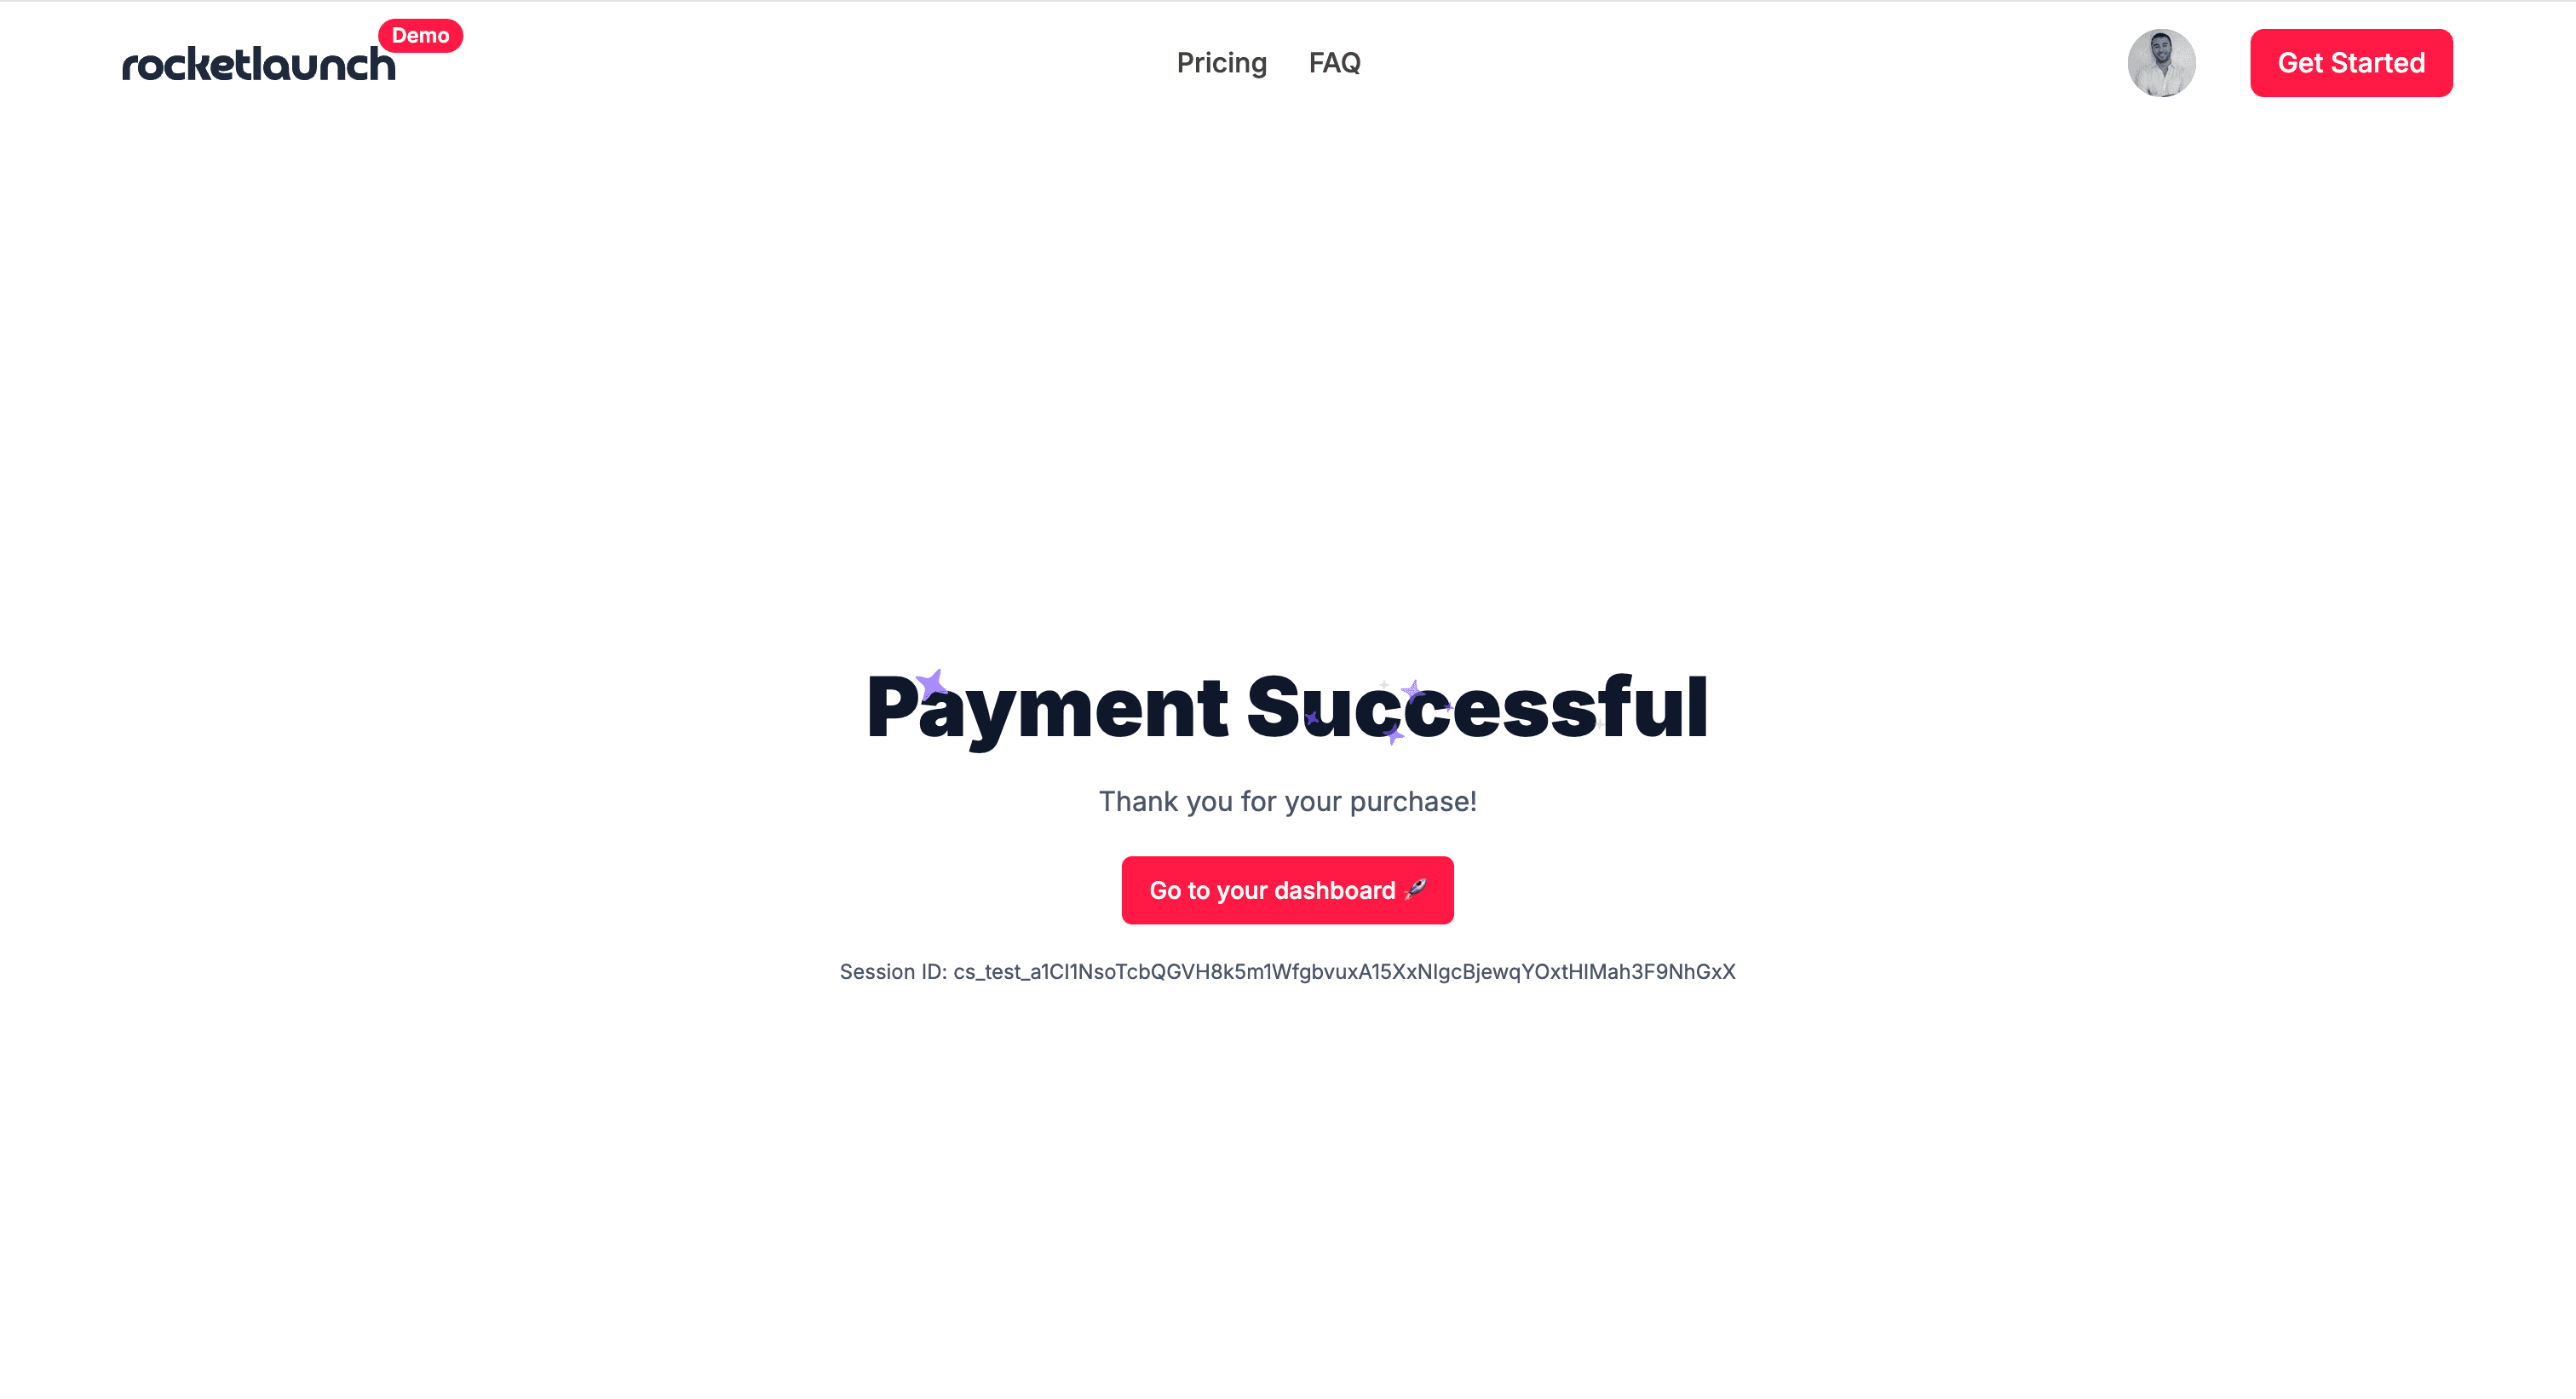
5. Start Your Project and Test the Subscription Flow
Now that all keys and webhook are set up, start your project and select the subscription plan.
When you proceed to the payment page, Stripe will handle the checkout process. If everything is configured correctly, you will be redirected to a success page.
6. Verify User Subscription in the Database
Once the payment is successful, you can check your Supabase database. You should see that the user’s subscription status has been updated.

Only users with an active subscription will have access to the dashboard.
And that's it!
You’ve now set up Stripe to handle payments and automatically update your user subscriptions !